Smart Forms
#Overview
Smart Forms (/admin/smart-forms) turn a legal document into something a client can fill in and sign
online. You write (or let AI draft) the document with fields placed inside the wording. The client fills the
fields beside a live copy of the document, signs on screen and submits. You get the completed document as a PDF,
can file it on a matter, and can send it back for corrections.
The same walkthrough, with pictures, is on the public page /smart-forms ("How it works").
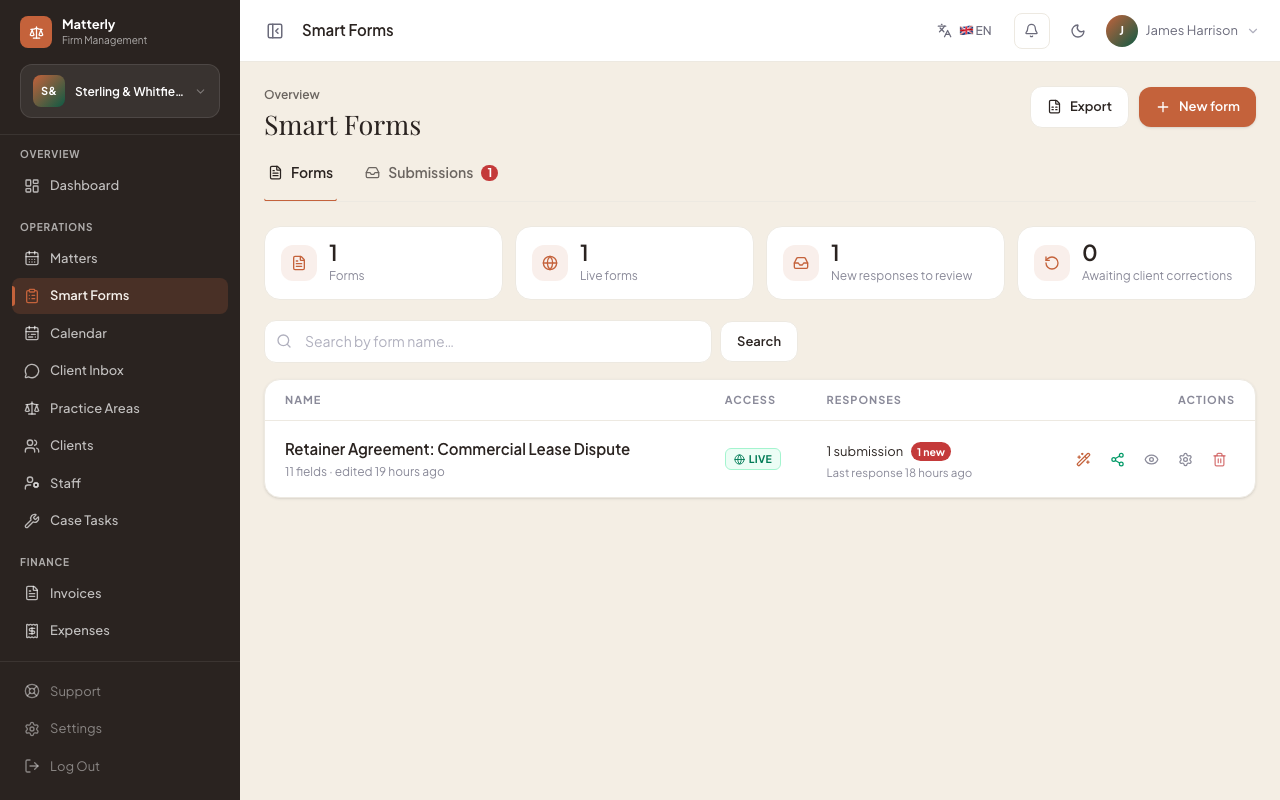
The list shows every form with its access state (Live, Draft, Expired, PIN), how many responses it
has, how many are new, and when the last one arrived. The cards at the top count your forms, the live ones, new
responses waiting for review, and responses where you are waiting on the client to correct something.
Click New form and pick how to start.
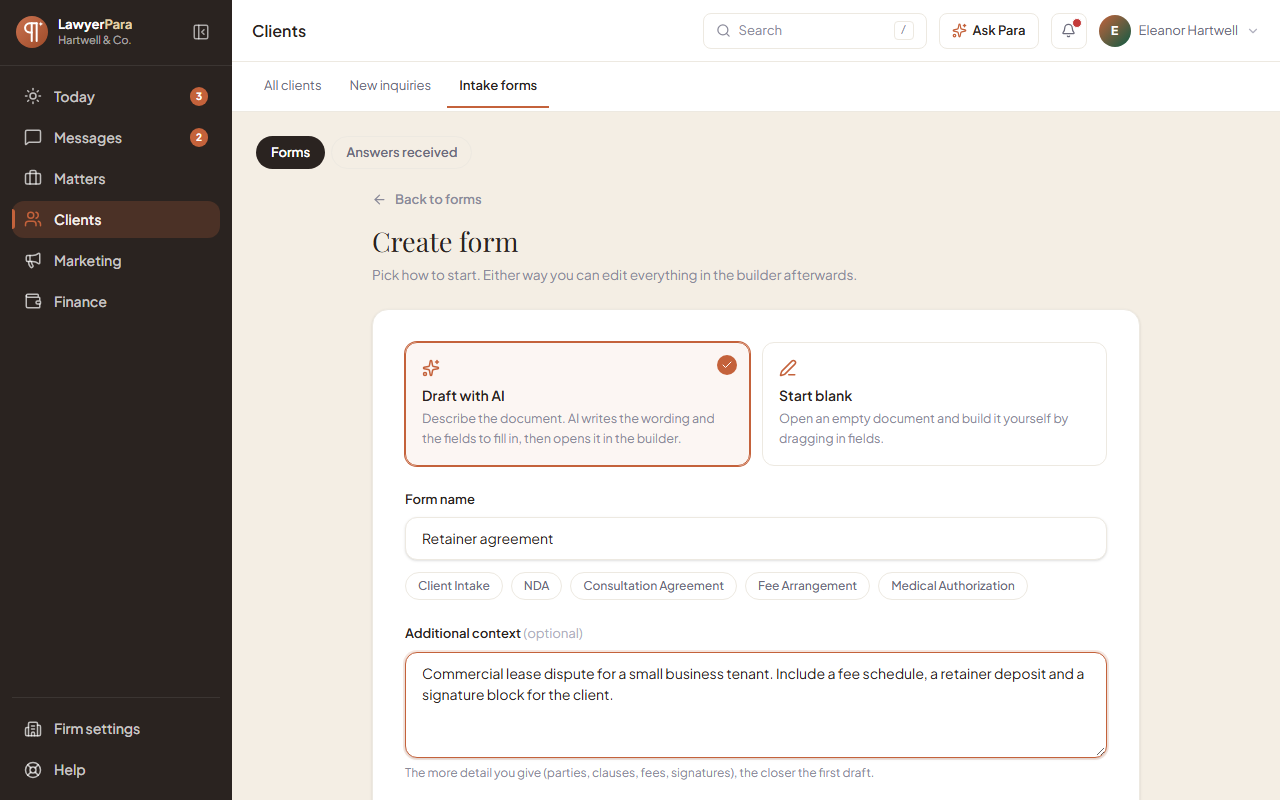
| Option |
What happens |
| Draft with AI |
Describe the document (parties, clauses, fees, signatures). AI writes the wording and the fields, then opens it in the builder. Uses AI credits. |
| Start blank |
Opens an empty document in the builder. |
The preset chips (Client Intake, NDA, Consultation Agreement, Fee Arrangement, Medical Authorization) fill in the
name for you. Turn on Right-to-left for Arabic, Hebrew or Urdu documents.
#2. Arrange it in the builder
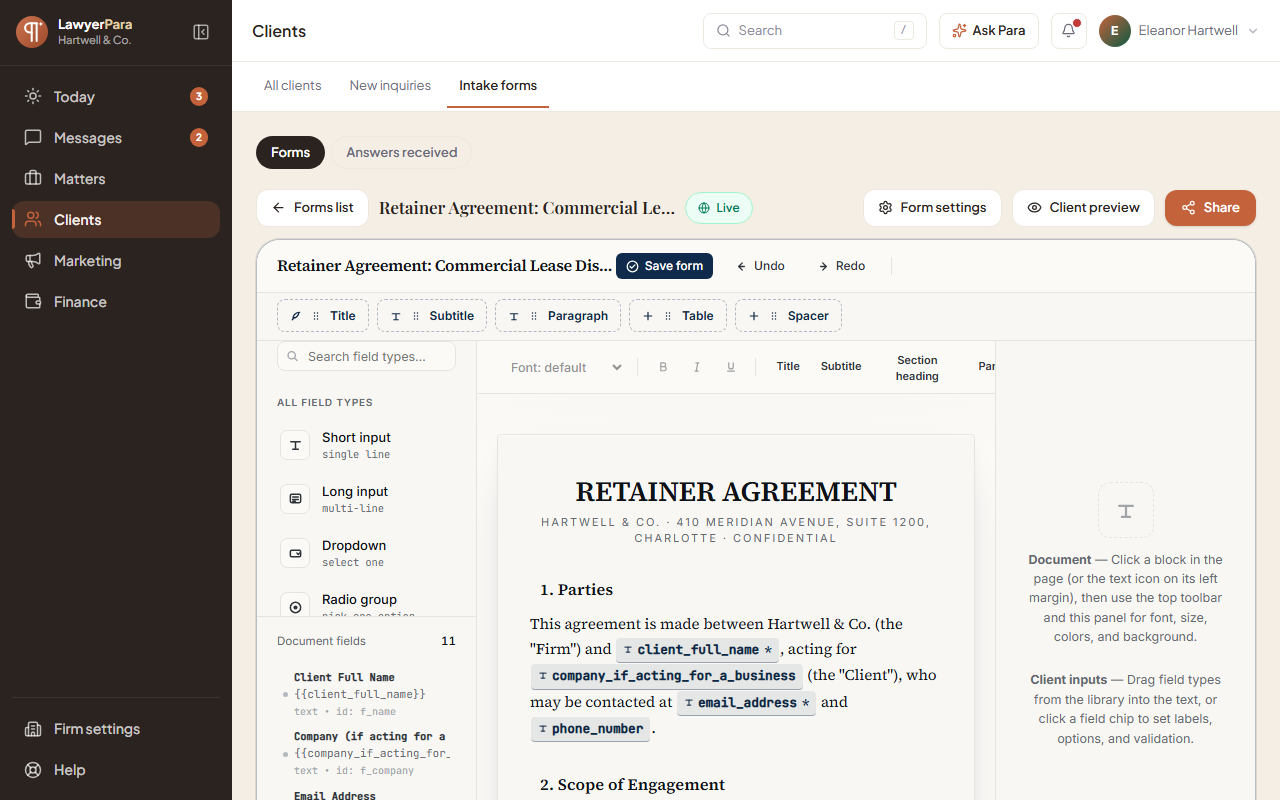
- Drag a field type from the left palette into the text, where the client's answer belongs.
- Click any sentence to edit it. The top toolbar adds titles, subtitles, paragraphs, tables and spacers.
- Click a field chip to set its label, options, validation and whether it is required.
- Nine field types: short text, long text, number, date, dropdown, single choice, checkbox, file upload and
signature. Date fields give the client a calendar picker and only accept real dates.
- Press Save form. The bar above the builder confirms Saved. Client preview opens the form as the client
will see it (read-only).
- On a laptop the palette and settings panels get narrower to leave room for the document. On a tablet or phone the
builder stacks them: the field palette first, then the document, then the field settings, each scrolling on its own.
Dragging fields into the text works best with a mouse or trackpad.
#3. Share it securely
Click Share (on the list or in the builder).
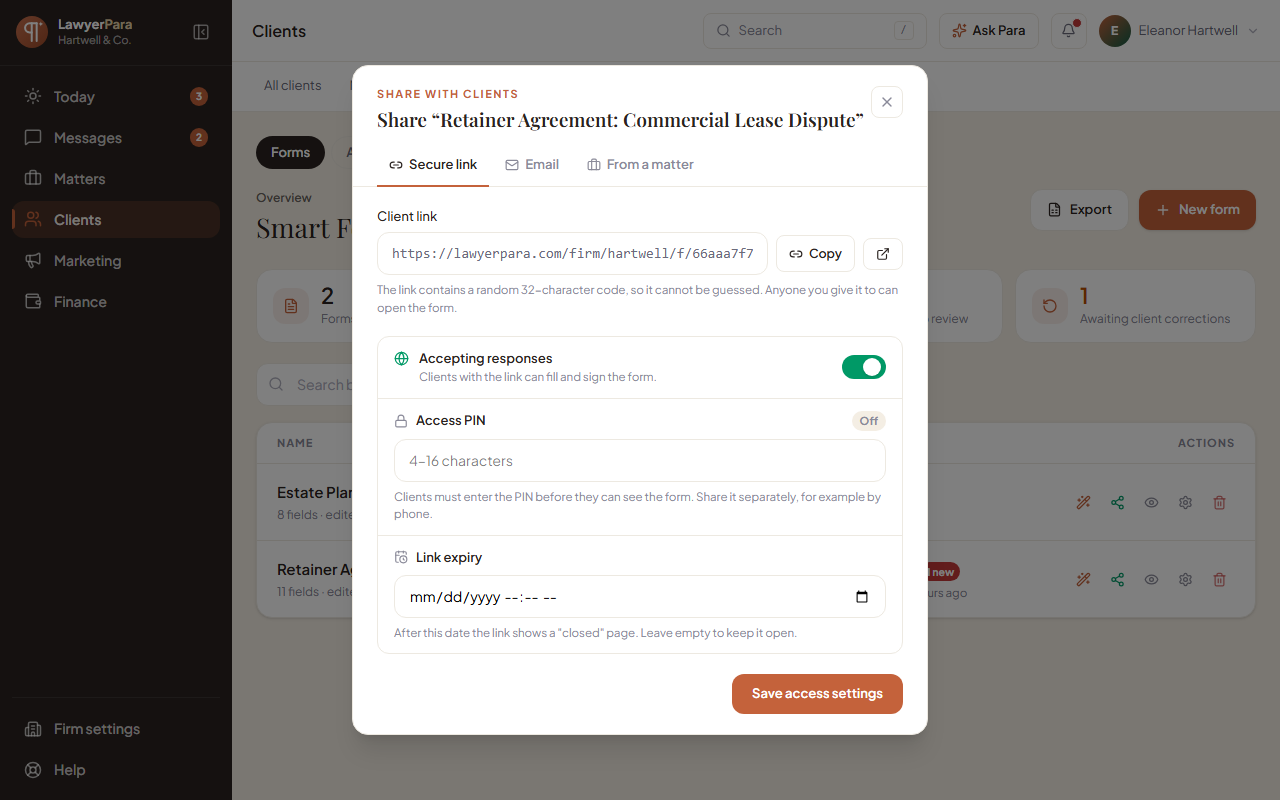
| Tab |
What it does |
| Secure link |
Copy or open the form's link. It contains a random 32-character code, so it cannot be guessed. |
|
Accepting responses: switch the link on or off (off = draft; the link shows "not found"). |
|
Access PIN: clients must enter it before the form opens. Share the PIN separately. |
|
Link expiry: after this date the link shows a "closed" page. |
| Email |
Send the link from LawyerPara with your own message. |
| From a matter |
Explains sending from a matter's Forms tab: pick one or more forms, the client gets them in one email, and each response is filed on that matter automatically. The tab shows what is still outstanding and can resend. |
Form settings (the gear icon) also covers the form name, the intro note shown to the client, the submit
button label and whether staff are notified.
When you paste the link into email, WhatsApp or Slack, it shows a preview with the form name, your firm name and your
firm's image. Form links never appear in search engines.
#4. The client fills it in and signs
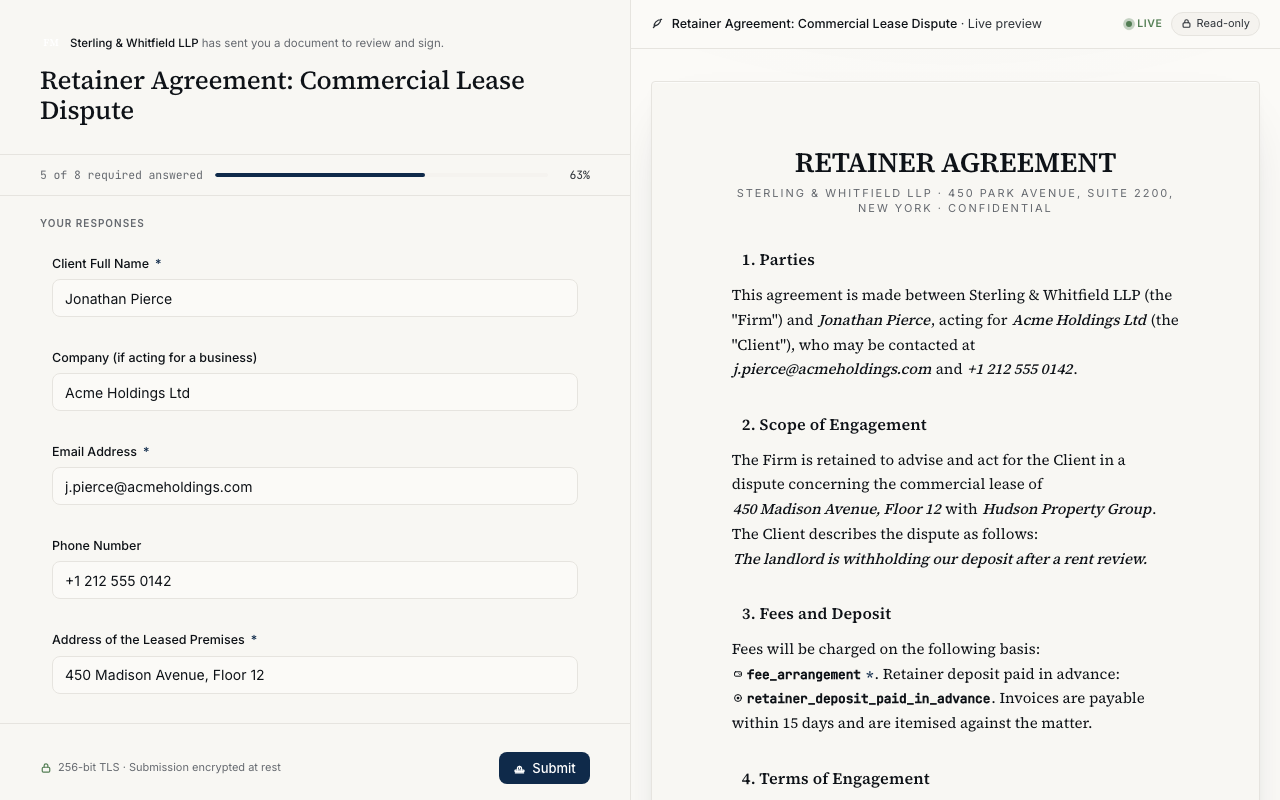
The client sees the questions on the left and the document filling in on the right. On a phone the questions come
first and the live document follows below them. A progress bar shows how many required answers are done. If they press Submit with required answers missing, the form lists them, outlines
each one and jumps to the first; nothing is sent until they are complete.
#5. Everyone is notified
When a response arrives:
- The client receives a receipt email with their copy of the completed document attached as a PDF (sent when
the form captured a valid email address, including after a resubmission).
- Firm staff get an in-app notification, and firm admins, partners and office managers get an email with
the PDF attached. Switch staff notifications off per form in Form settings.
- The Submissions tab shows a New count.
#6. Review: approve it, or ask for changes
Open Submissions and pick a response. Read it as a Document or a list of Answers, download the PDF,
link it to a matter, Accept or Archive it.
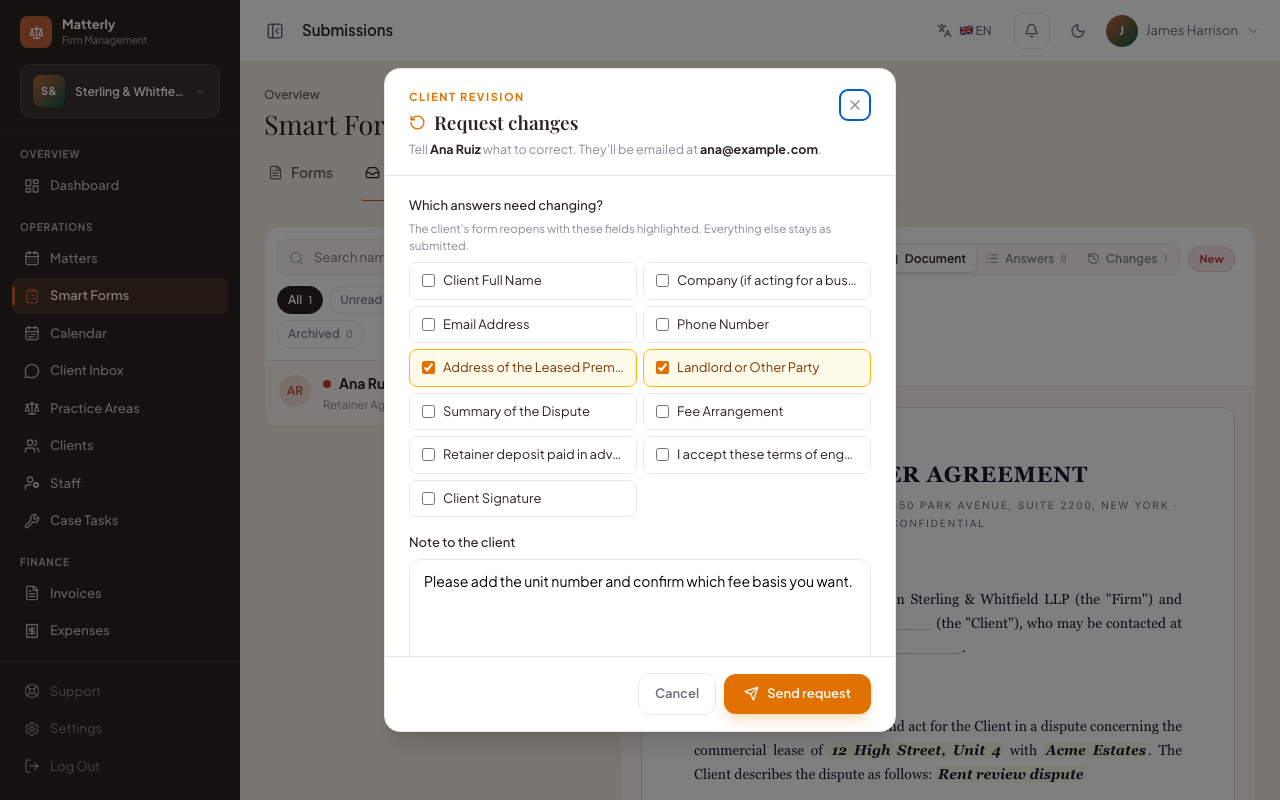
Request changes: tick the answers that need fixing and/or add a note. The client is emailed a link that reopens
their form with those answers highlighted ("Please update") and everything else kept as they submitted it. If there
is no email on file, copy the resubmission link from the banner and send it yourself.
When the client resubmits, the response returns to New, and a Changes view appears:
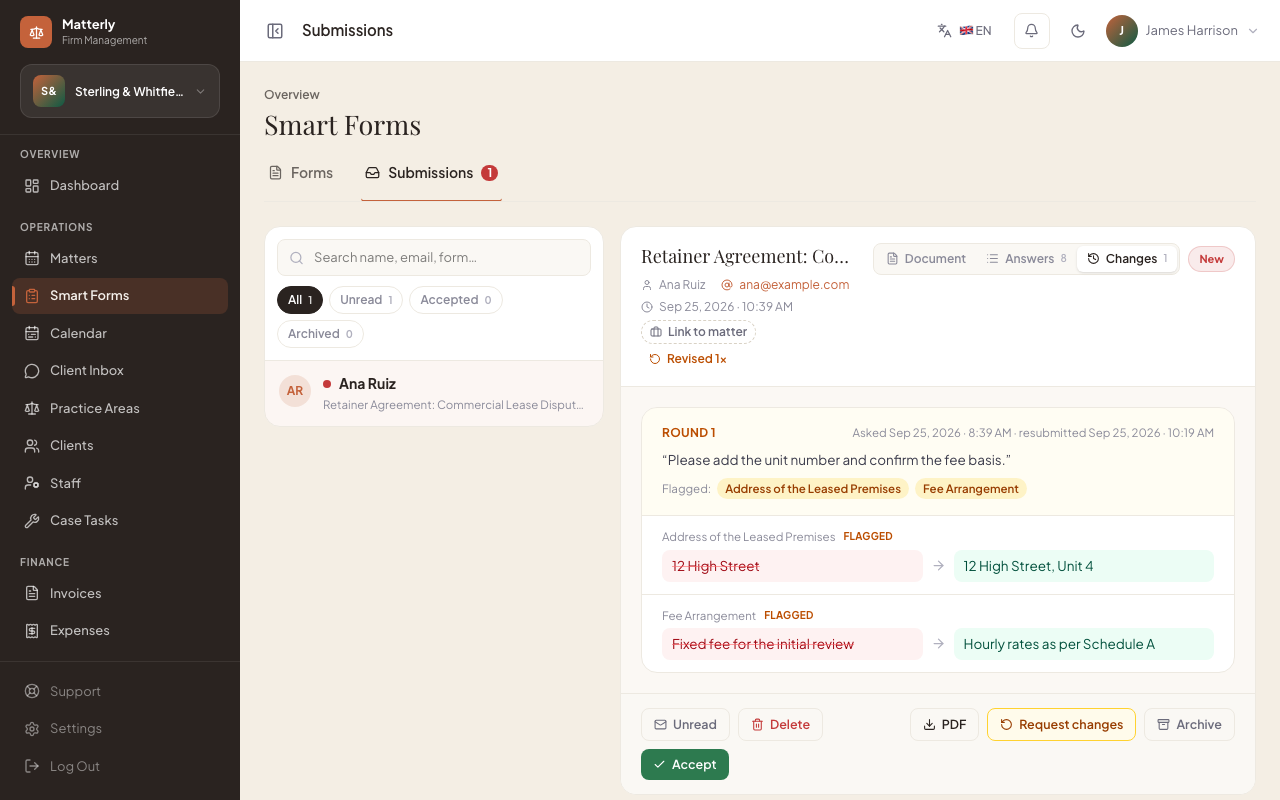
Each round shows your note, the flagged fields, when you asked and when they resubmitted, and every answer that
changed, old value struck through, new value beside it. Answers you had flagged are marked Flagged. Earlier
versions are never overwritten.
#Try it
The public demo links a live Smart Form from the homepage (Try a live Smart Form). Super Admins choose which
form that is under Super Admin → Landing page → Hero → Showcase Smart Form; see the
Super Admin Guide.
#Best practices
- Build your three most-used intake documents on day one.
- Send forms from the matter whenever they belong to a case, so responses file themselves.
- Use a PIN for anything sensitive, and set an expiry on one-off requests.
- When asking for corrections, flag the exact answers rather than only writing a note: the client sees precisely
what to change, and the Changes view shows whether they did.